The Ultimate Guide to Cooking Fall-Off-the-Bone Tender Short Ribs in the Oven
Walking into your kitchen and catching that rich, savory aroma of slowly braised meat creates an immediate sense of warmth and anticipation. There’s something deeply satisfying about transforming a tough cut of beef into something so tender it practically melts away from the bone. Your grandmother likely understood this alchemy better than most modern cooks, knowing that patience and proper technique could turn an affordable piece of meat into a feast worthy of celebration.
Mastering the art of cooking tender short ribs in your oven doesn’t require professional training or expensive equipment. What you need is understanding, technique, and the willingness to let time work its magic on your behalf.
Table of contents
Understanding Short Ribs: Your Foundation for Success
Before diving into cooking methods, you’ll want to understand exactly what makes short ribs special. These cuts come from the chuck, plate, or rib areas of the cow, containing significant amounts of connective tissue and marbling. This combination might seem challenging at first glance, but it’s precisely what transforms into rich, succulent meat when cooked properly.
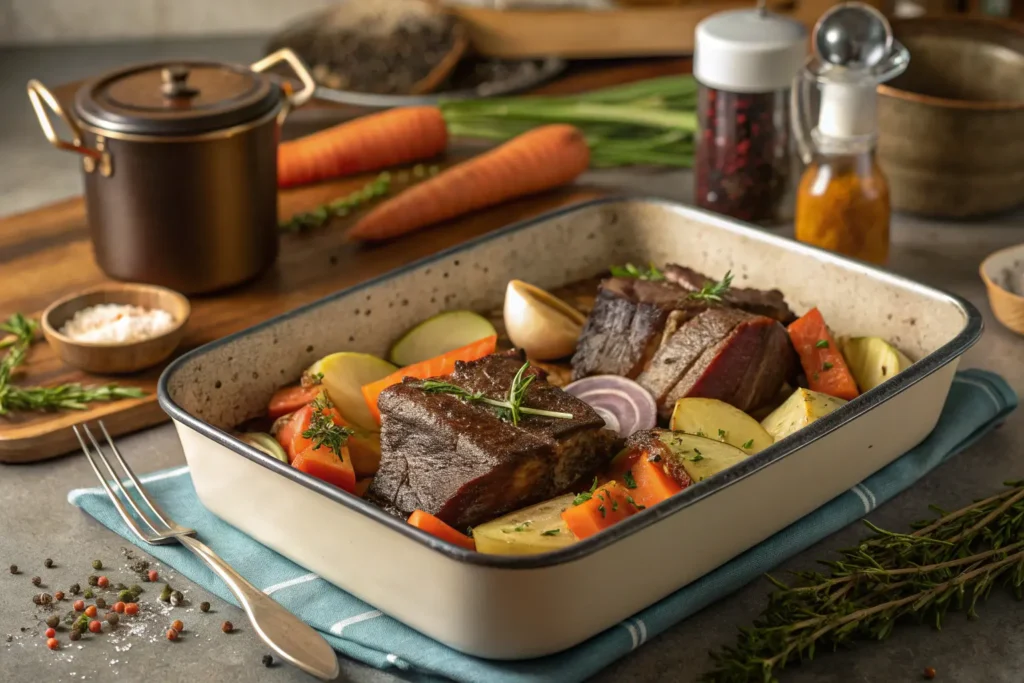
When shopping for short ribs, you’ll encounter two primary cuts: English cut and flanken cut. English cut ribs run parallel to the bone, creating thick, rectangular pieces perfect for braising. Flanken cut ribs are sliced across the bones, revealing cross-sections of bone within thinner strips of meat.
For achieving maximum tenderness in your oven, English cut ribs work best. Their thickness allows for extended cooking times without drying out, while their bone-in nature contributes additional flavor and helps maintain moisture throughout the cooking process.
Essential Ingredients for Perfect Results
Your ingredient selection directly impacts the final tenderness and flavor of your short ribs. Quality matters, but technique matters even more.
Core Components
| Category | Ingredient | Quantity (Serves 4-6) | Purpose |
|---|---|---|---|
| Protein | Beef Short Ribs | 4-5 lbs (bone-in) | Main ingredient |
| Aromatics | Yellow Onions | 2 large, diced | Flavor foundation |
| Carrots | 3 large, chopped | Natural sweetness | |
| Celery | 3 stalks, diced | Aromatic depth | |
| Garlic | 6 cloves, minced | Pungent complexity | |
| Liquids | Red Wine | 2 cups | Braising medium |
| Beef Broth | 3-4 cups | Moisture maintenance | |
| Seasonings | Tomato Paste | 3 tablespoons | Umami enhancement |
| Fresh Thyme | 4 sprigs | Herbaceous notes | |
| Bay Leaves | 3 leaves | Aromatic layers |
Your choice of wine significantly influences the final flavor profile. Full-bodied reds like Cabernet Sauvignon or Merlot work exceptionally well, but avoid anything you wouldn’t drink straight from the bottle.
Step-by-Step Method for Exceptional Tenderness
Preparation Phase
Start by removing your short ribs from refrigeration 30-45 minutes before cooking. Room temperature meat sears more evenly and prevents temperature shock during the cooking process. Season generously with coarse salt and freshly ground black pepper, allowing the seasoning to penetrate while you prepare other ingredients.
Dice your vegetables uniformly to ensure even cooking. Your onions should reach translucency at roughly the same time your carrots begin softening, creating a harmonious base for your braising liquid.
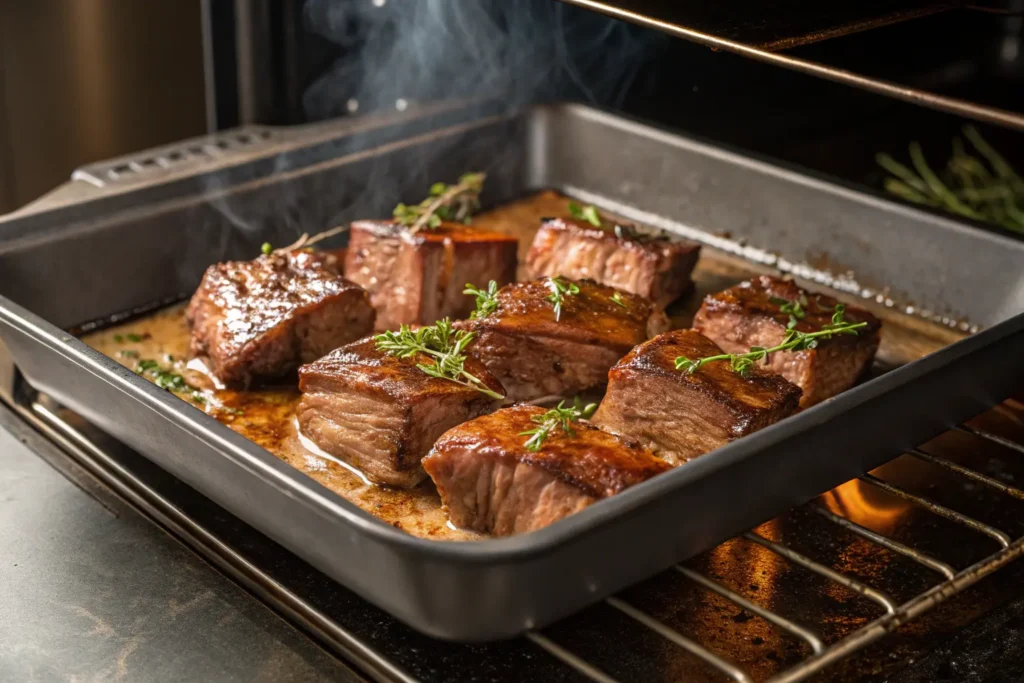
The Critical Searing Step
Heat your Dutch oven or heavy-bottomed pot over medium-high heat. Add a neutral oil with a high smoke point – grapeseed or avocado oil work excellently. Your pan is ready when a drop of water sizzles and evaporates immediately.
Sear each short rib for 4-5 minutes per side, developing a rich, caramelized crust. This Maillard reaction creates complex flavors that permeate throughout the entire dish. Resist the urge to move the meat before proper browning occurs – patience during this step pays dividends in flavor development.
Building Your Braising Foundation
Remove the seared ribs and set aside. In the same pot, add your diced vegetables to the remaining fat and fond. This deglazing process captures every bit of caramelized flavor from the searing stage.
Cook vegetables until your onions become translucent and slightly golden, approximately 6-8 minutes. Add minced garlic during the final minute to prevent burning while allowing its aroma to bloom.
Pour wine into the pot, scraping up any remaining fond with a wooden spoon. Allow the alcohol to cook off for 2-3 minutes before adding tomato paste, herbs, and beef broth. Your liquid should cover the ribs by approximately two-thirds when they return to the pot.
The Low and Slow Philosophy
Return your seared short ribs to the pot, nestling them into the braising liquid. Cover tightly with a heavy lid or aluminum foil, creating a sealed environment that traps moisture and heat.
Transfer to a preheated 325°F oven. This temperature represents the sweet spot for collagen breakdown without protein toughening. Higher temperatures cause muscle fibers to contract aggressively, expelling moisture and creating tough, chewy results.
Timing Your Success
Plan for 2.5 to 3 hours of cooking time, though your ribs will tell you when they’re ready. Proper doneness reveals itself through several indicators:
- Meat easily separates from bone with gentle pressure
- Fork penetration requires minimal effort
- Internal temperature reaches 195-205°F
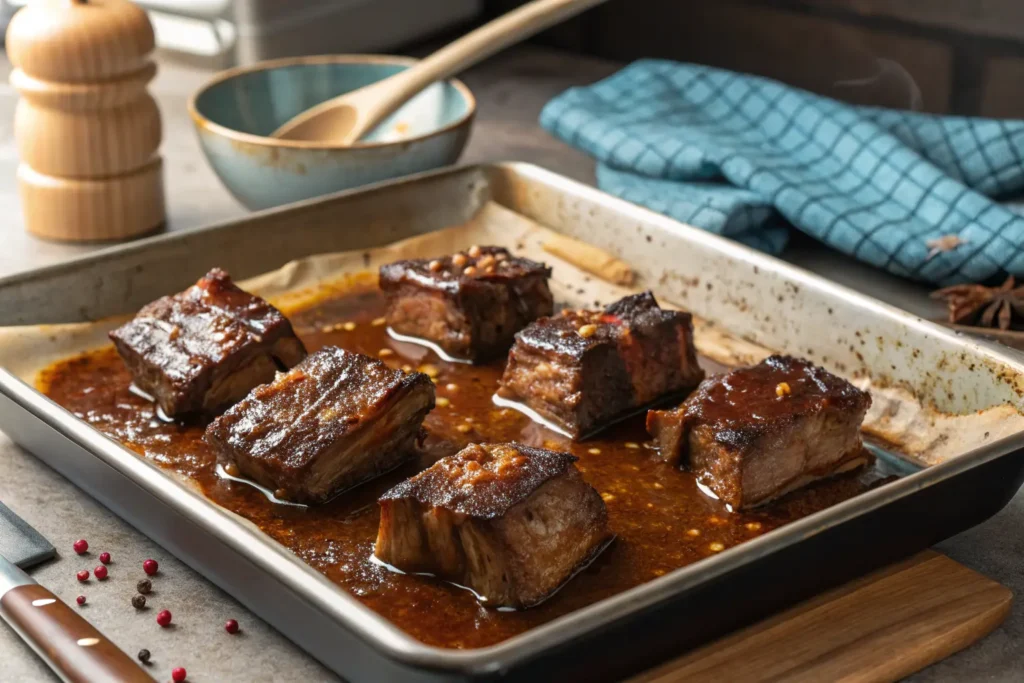
- Braising liquid reduces to a glossy, concentrated consistency
Pro Techniques for Maximum Tenderness
Temperature consistency matters more than precise timing. Invest in an oven thermometer to verify your actual temperature, as many home ovens run hot or cold by 25-50 degrees.
Check your ribs after 2 hours, adding additional broth if liquid levels drop below halfway up the meat. Your braising environment should remain moist throughout the entire cooking process.
Avoid lifting the lid frequently, as each peek releases valuable steam and extends cooking time. Trust the process and allow steady, gentle heat to work its transformation.
Common Mistakes That Sabotage Tenderness
Rushing the Process
High heat might seem efficient, but it guarantees tough, disappointing results. Collagen requires specific time and temperature combinations to break down into gelatin. Shortcuts simply don’t exist in proper braising.
Insufficient Liquid Management
Your braising liquid serves multiple purposes: conducting heat, maintaining moisture, and creating sauce. Monitor levels throughout cooking, replenishing with warm broth as needed.
Skipping the Searing Stage
While technically optional, searing creates flavor compounds impossible to achieve through braising alone. This step distinguishes restaurant-quality results from merely adequate ones.
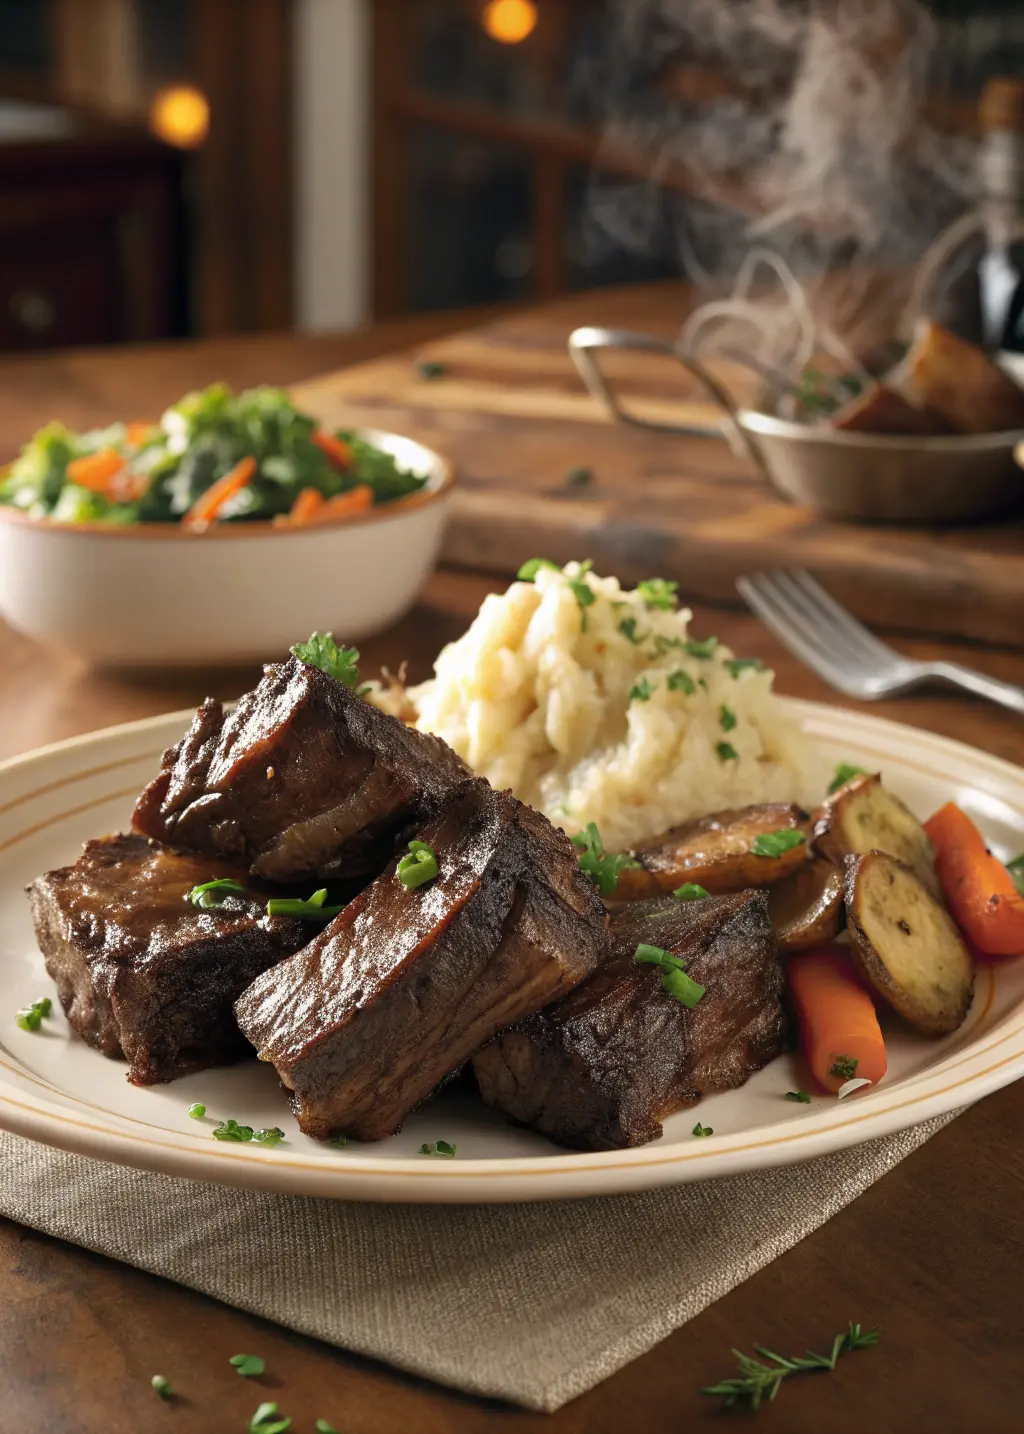
Serving Your Masterpiece
Your perfectly tender short ribs deserve thoughtful presentation. Strain and reduce the braising liquid into a glossy sauce, adjusting seasoning as needed. Classic pairings include:
- Creamy mashed potatoes for sauce absorption
- Buttered egg noodles for comfort food satisfaction
- Roasted root vegetables for textural contrast
- Creamy polenta for elegant presentation
Frequently Asked Questions
How long does it take to cook tender short ribs in the oven? Achieving perfectly tender short ribs requires 2.5 to 3 hours at 325°F. This duration allows complete collagen breakdown while maintaining moisture and developing complex flavors.
What temperature ensures maximum tenderness? Maintain 325°F throughout cooking. Higher temperatures toughen proteins, while lower temperatures may not adequately break down connective tissues.
Should I cover short ribs during cooking? Absolutely. Covering traps essential moisture, creating the humid environment necessary for proper braising and tenderness development.
Your Path to Short Rib Mastery
Cooking exceptional tender short ribs in your oven combines science with artistry. Understanding the why behind each technique empowers you to adapt and improve with each attempt. Your patience during the slow cooking process will be rewarded with meat so tender it requires only a fork to serve.
The transformation from tough, sinewy beef to fork-tender perfection represents one of cooking’s most satisfying achievements. Each bite delivers rich, complex flavors developed through proper technique and time investment.
Ready to create your own short rib masterpiece? Gather your ingredients, preheat your oven, and embark on this rewarding culinary journey. Share your results and variations in the comments below – your fellow home cooks would love to learn from your experiences and celebrate your success together.
Have you given our recipe a try?
There are no reviews yet. Be the first one to write one.